
DOM-E5153 - Introduction to Workshops and Studio Facilities, 08.09.2020-13.10.2020
Kurssiasetusten perusteella kurssi on päättynyt 13.10.2020 Etsi kursseja: DOM-E5153
Osion kuvaus
-
Your task for this course is to create an enclosure for your Teensy Microcontroller. You can make the computer see your Teensy in different ways:
- USB Mouse
- USB Keyboard
- USB MIDI Controller
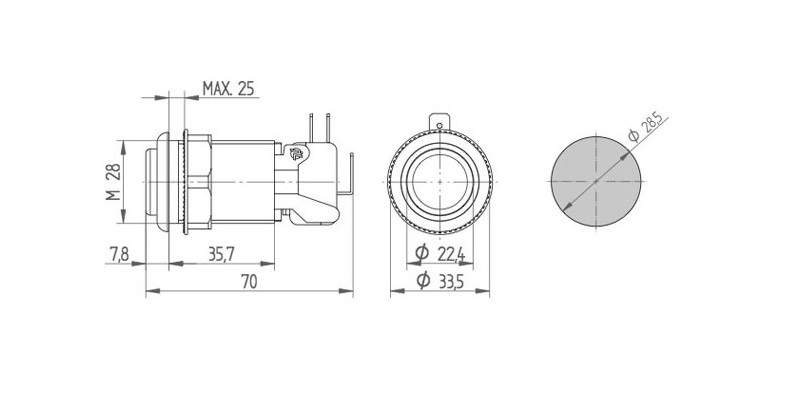
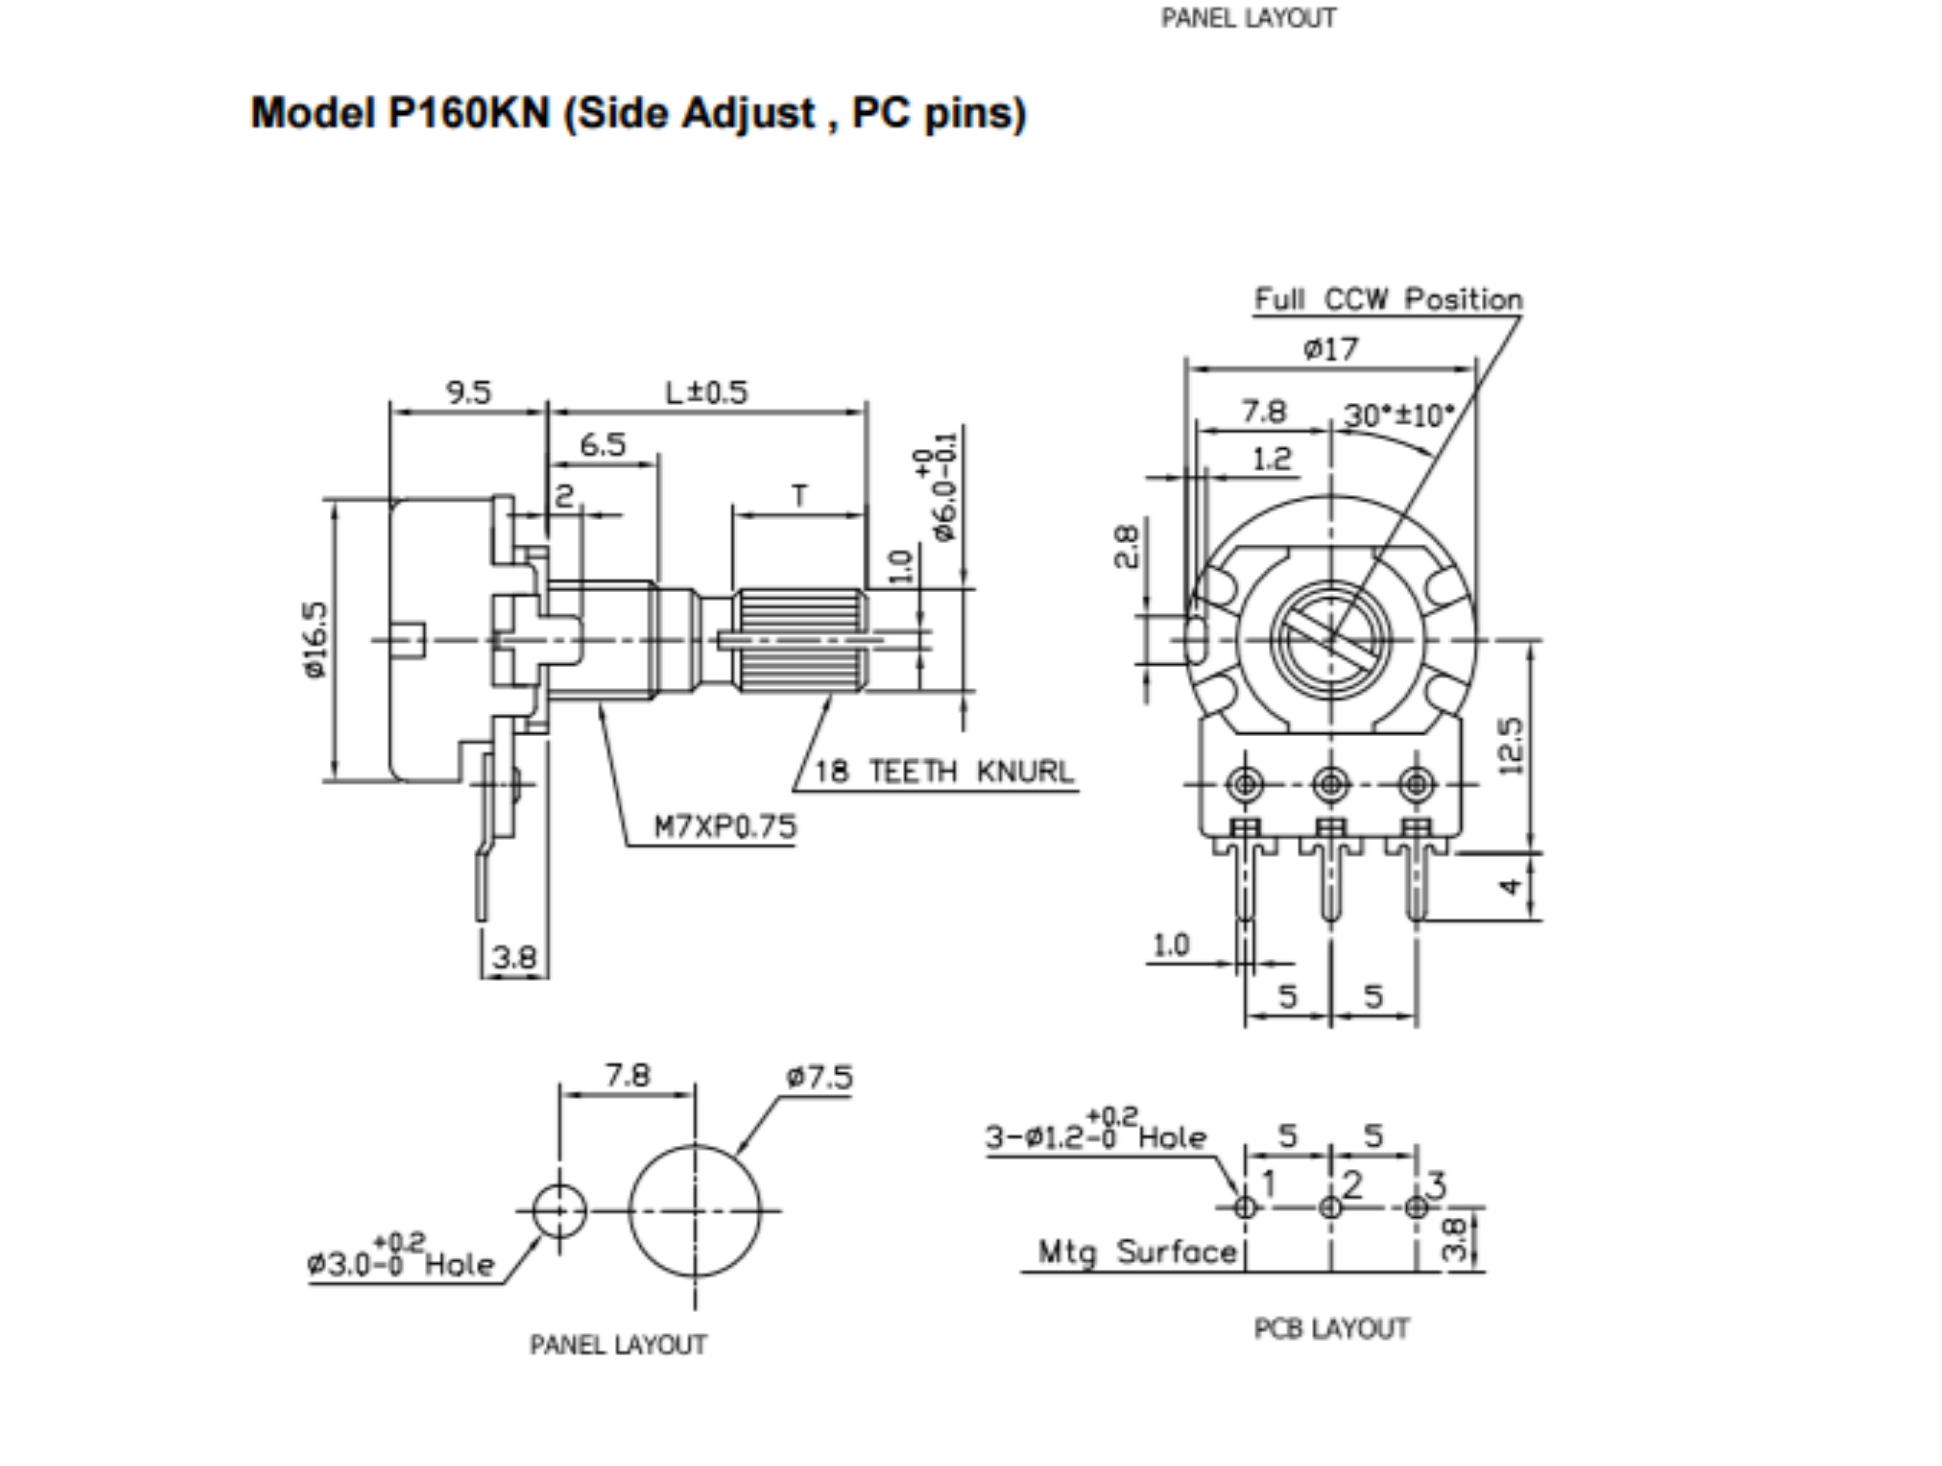
You will get the electronics parts for making the controller including a couple of potentiometers and switches.
You can choose the way you want to do the controller. It can be either completely laser cut or you can combine laser cut and 3D printed parts. You can of course also work in the other workshops (metal, wood etc.) for additional parts of the controller. Some possibilities:
- cut an aluminium panel with the waterjet cutter
- print some stickers in the Printlab
- 3d print some knobs for you potentiometers
This page will have an updated list of resources to help you build the version with the laser cutter.
Matti's Walkthrough of the Process
Step 1: Figure out the kerf of the laser cutter
[video missing]
Step 2: Cut out some test pieces for the finger joints
Step 3: Design the Box
Step 4: Prepare the Files for the Laser Cutter
How to do the offset in Illustrator:
https://mycourses.aalto.fi/pluginfile.php/1262252/course/section/170096/kerf_illustrator.pdf
Videos Show Alternative Techniques:
Completely parametric finger joints for the laser cutter:
Another way of adjusting your files with the kerf compensation
Playlist for creating a parametric enclosure in Fusion 360