DOM-E5153 - Introduction to Workshops and Studio Facilities, 08.09.2020-13.10.2020
This course space end date is set to 13.10.2020 Search Courses: DOM-E5153
Laser Cutter Kerf Measurement
Krav för slutförande
Visa
Lämna in
Senaste inlämningsdatum: fredag, 9 oktober 2020, 16:00
Part A
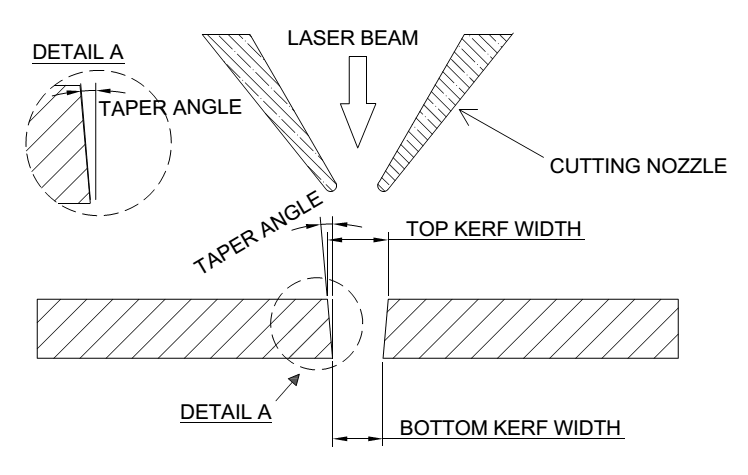
Your task is to figure out the kerf of the Trotec laser cutter when cutting the 4mm plywood I gave you. Essentially, you are trying to figure out how wide the laser beam is, or more specifically, how much material the laser burns away while cutting.

One way to figure this out:
- Design a piece (I recommend a square for easy measurement) with known dimensions. Keep it fairly small (20-50mm).
- Cut it with the laser cutter.
- Measure the piece you cut, both sides (x and y).
- Compare this to the measurement that you had in your file and calculate the difference between them.
- Divide the result from this calculation by two. (Since you have two lines that were cut, left and right or top and bottom).
- This final result is the kerf of this machine (with this material).*
*To be really precise, this final value is actually half of the kerf width, since it removes that amount of material from both sides of the cutting line, but we are only measuring from one side of the line. A more accurate name would be kerf compensation.
Part B
Design a finger joint test piece. See the video below.
- Create files for the laser cutter in Fusion 360 with three different values for the kerf compensation.
- One value should be exactly the kerf you measured
- One value should be a little bit smaller
- One value should be a little larger
- Export the .dxf files to Illustrator and make the required changes to prepare them for the laser cutter.
- Cut all three pieces. Or actually 3 x 2 pieces. I recommend adding some sort of marking on the top of the piece so you don't get them mixed up.
- Try them all out and choose the one that seems the best, not too loose, not too tight.
Submit two things:
- The kerf compensation value you measured and calculated in mm. (Half of the actual kerf).
- Picture(s) of the test pieces you cut. Mark to the pieces which value was the best fit.
For additional help in understanding this assignment, check out this video:
