
OK7 Costume Workshop
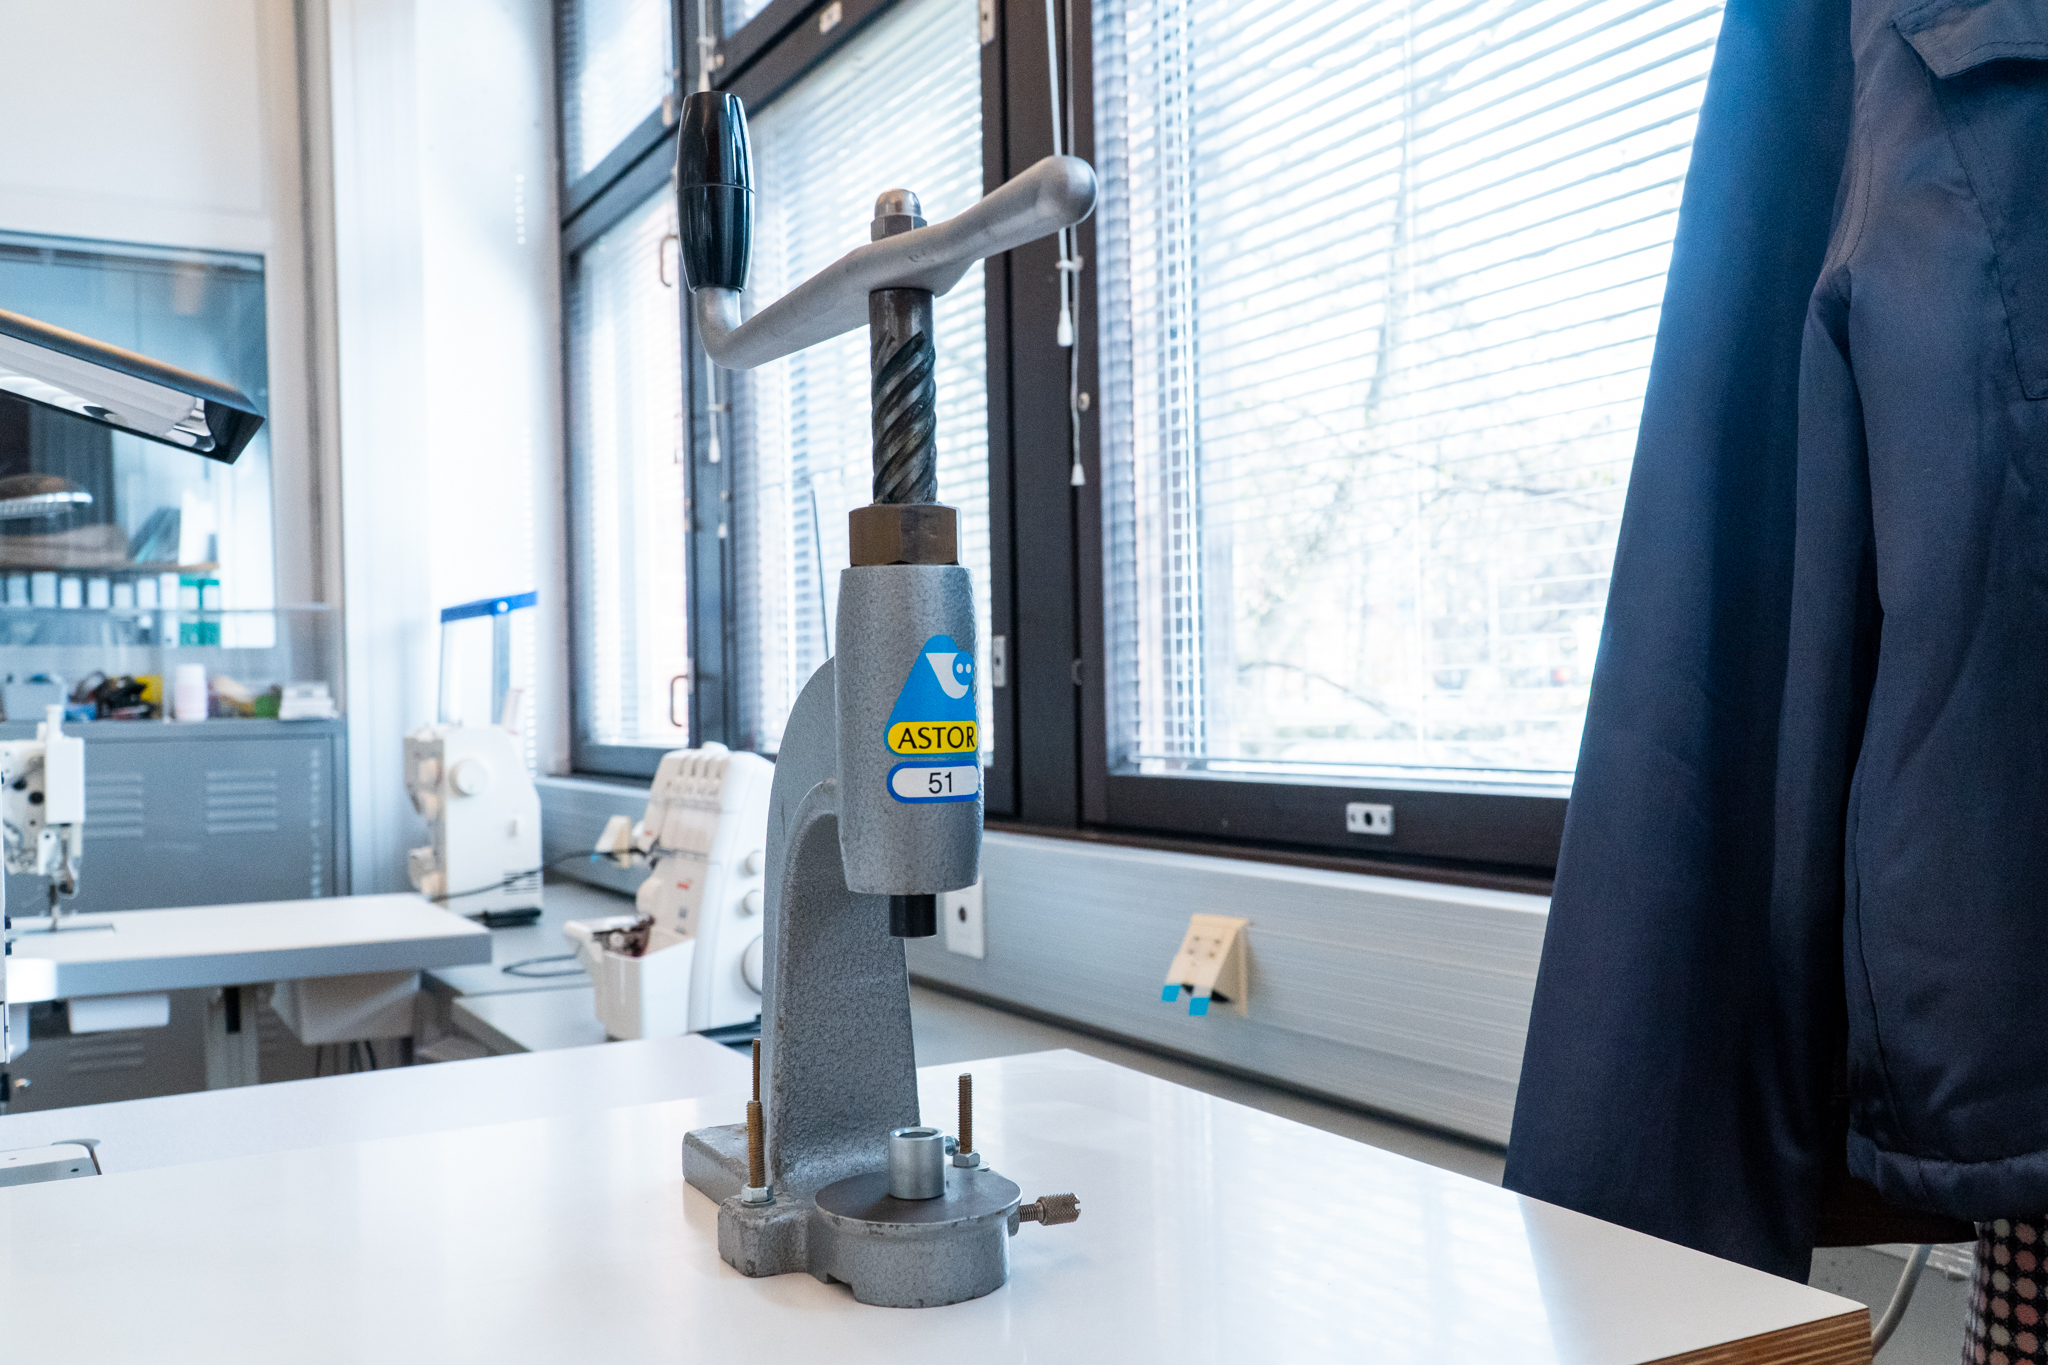
Astor -press
Completion requirements
- eyelets
- fabric-covered buttons
- press studs for strech materials.
Please note that the press has separate tools for different types of fasteners.
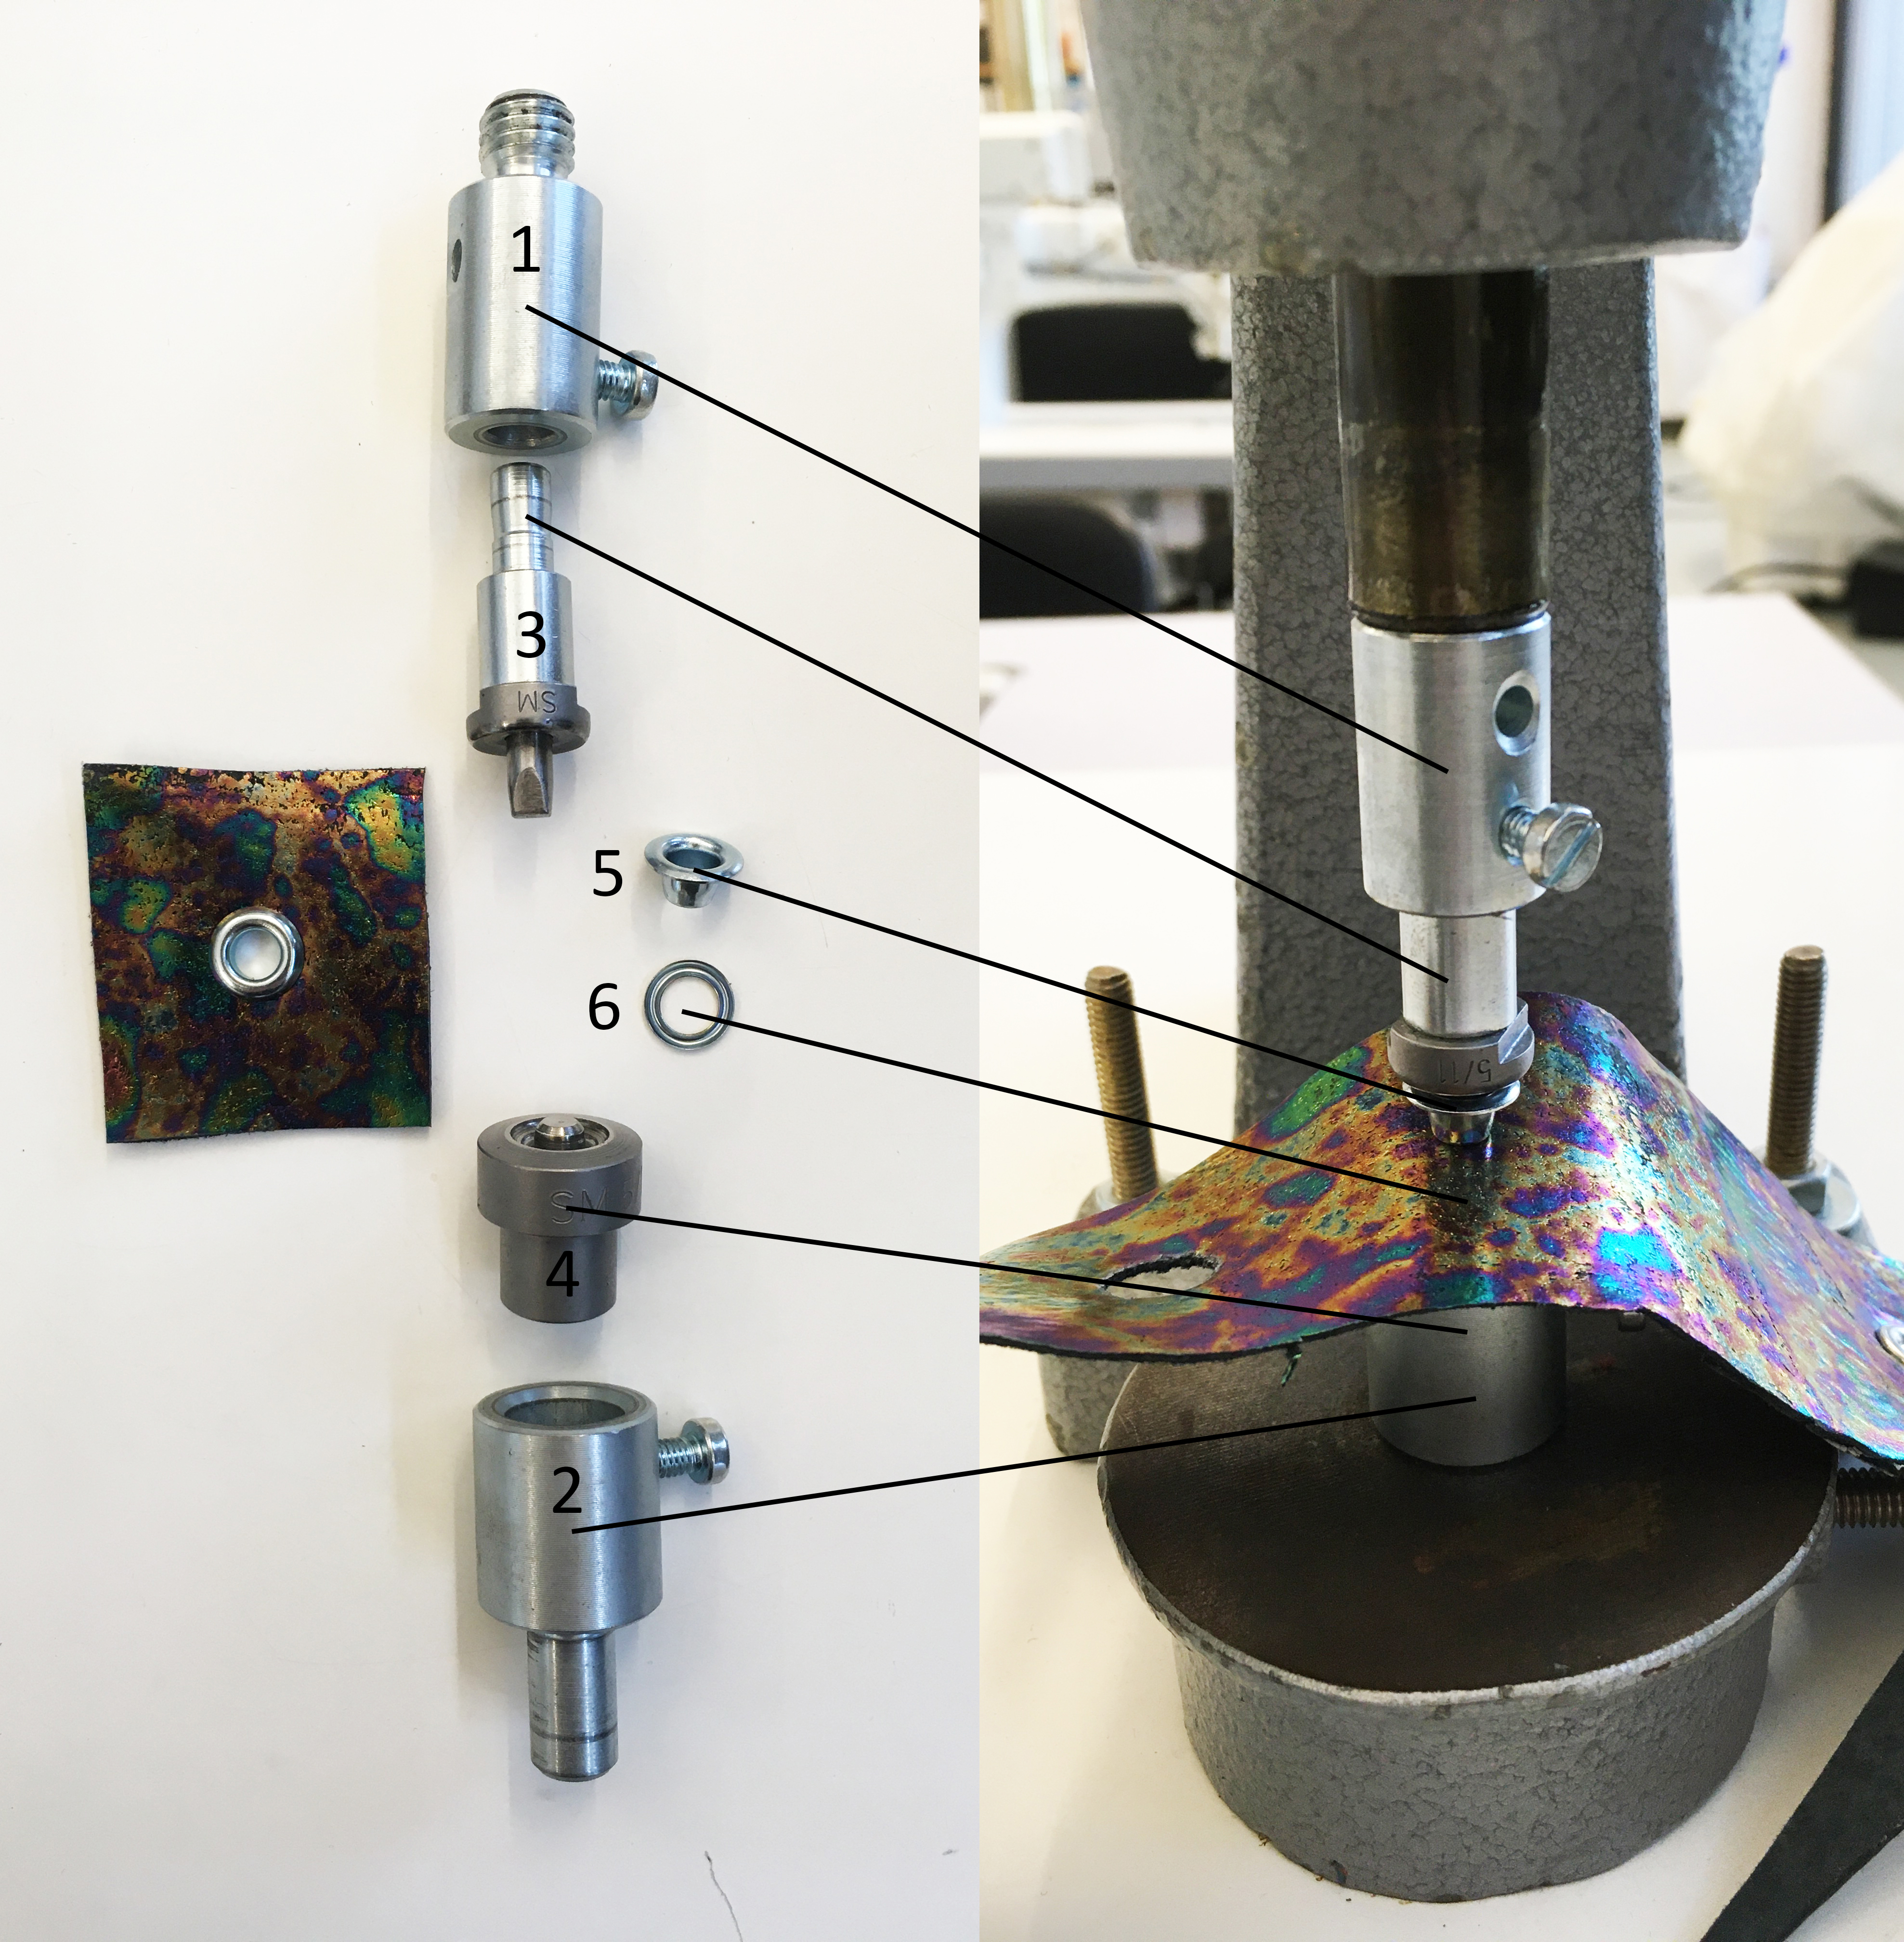
Self-drilling eyelets 5/11 and 4/7
- Insert the machine parts as illustrated. Do not overtighten. You will need:
- a separate adapter for the top and bottom (1, 2)
- the top and bottom tool part in the correct size (3, 4)
- an eyelet (5) and a washer (6).
- Insert the eyelet into the upper tool part as illustrated (3) and the flat ring with the groove facing up on the lower tool part (4).
- Put the fabric in place and align the press with the marking you have made. You do not have to pre-punch a hole in the fabric.
- Press the eyelet in place. Do not press too hard or the eyelet may pierce through the fabric. Always test your material beforehand.
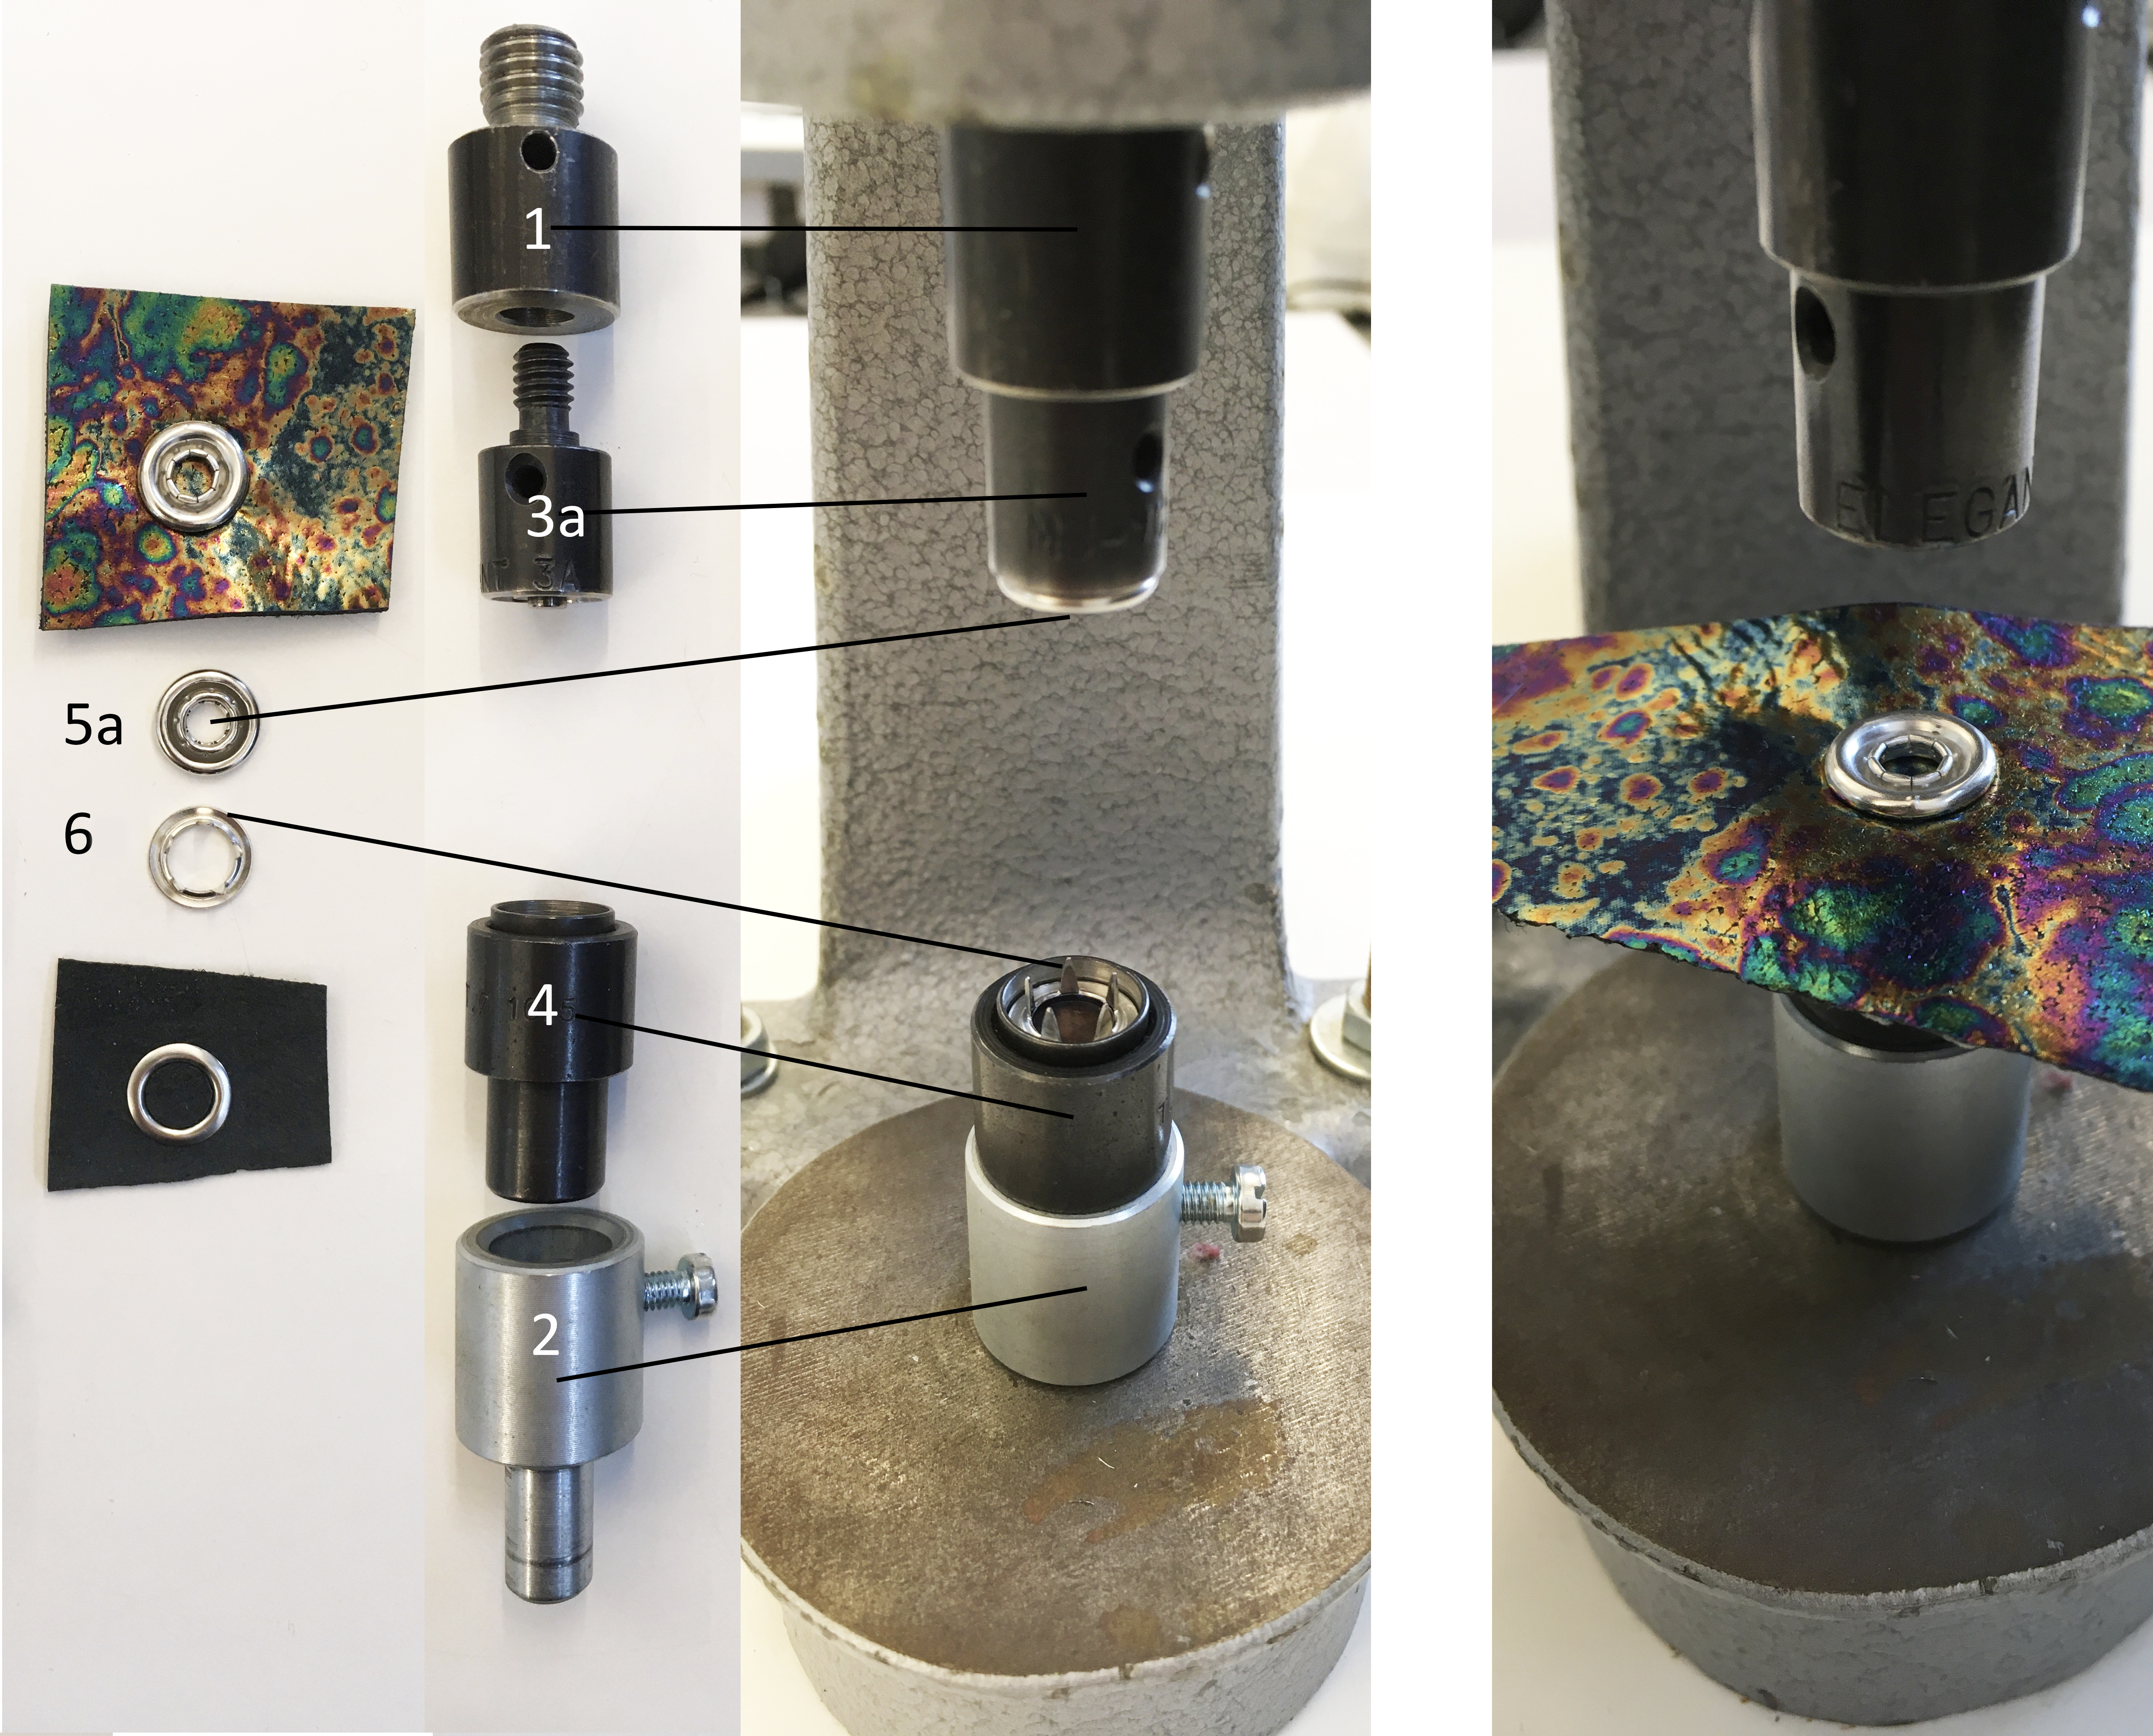
Press-studs
You will need a separate top tool for the female (3a) and male (3b) component of the press-stud. The back components and lower part of the tool (Elegant 3/1) are the same for both female and male components.
Insert the Elegant 3a parts as illustrated, do not overtighten. You will need:
- a separate adapter for the top and bottom (1, 2)
- top part of the tool Elegant 3a and lower part of the tool Elegant 3/1 (3a, 4)
- the female component of the press-stud (5a) and its back (6).
- Put the fabric in place and align the press with the marking you have made. Press the press-stud in the fabric.
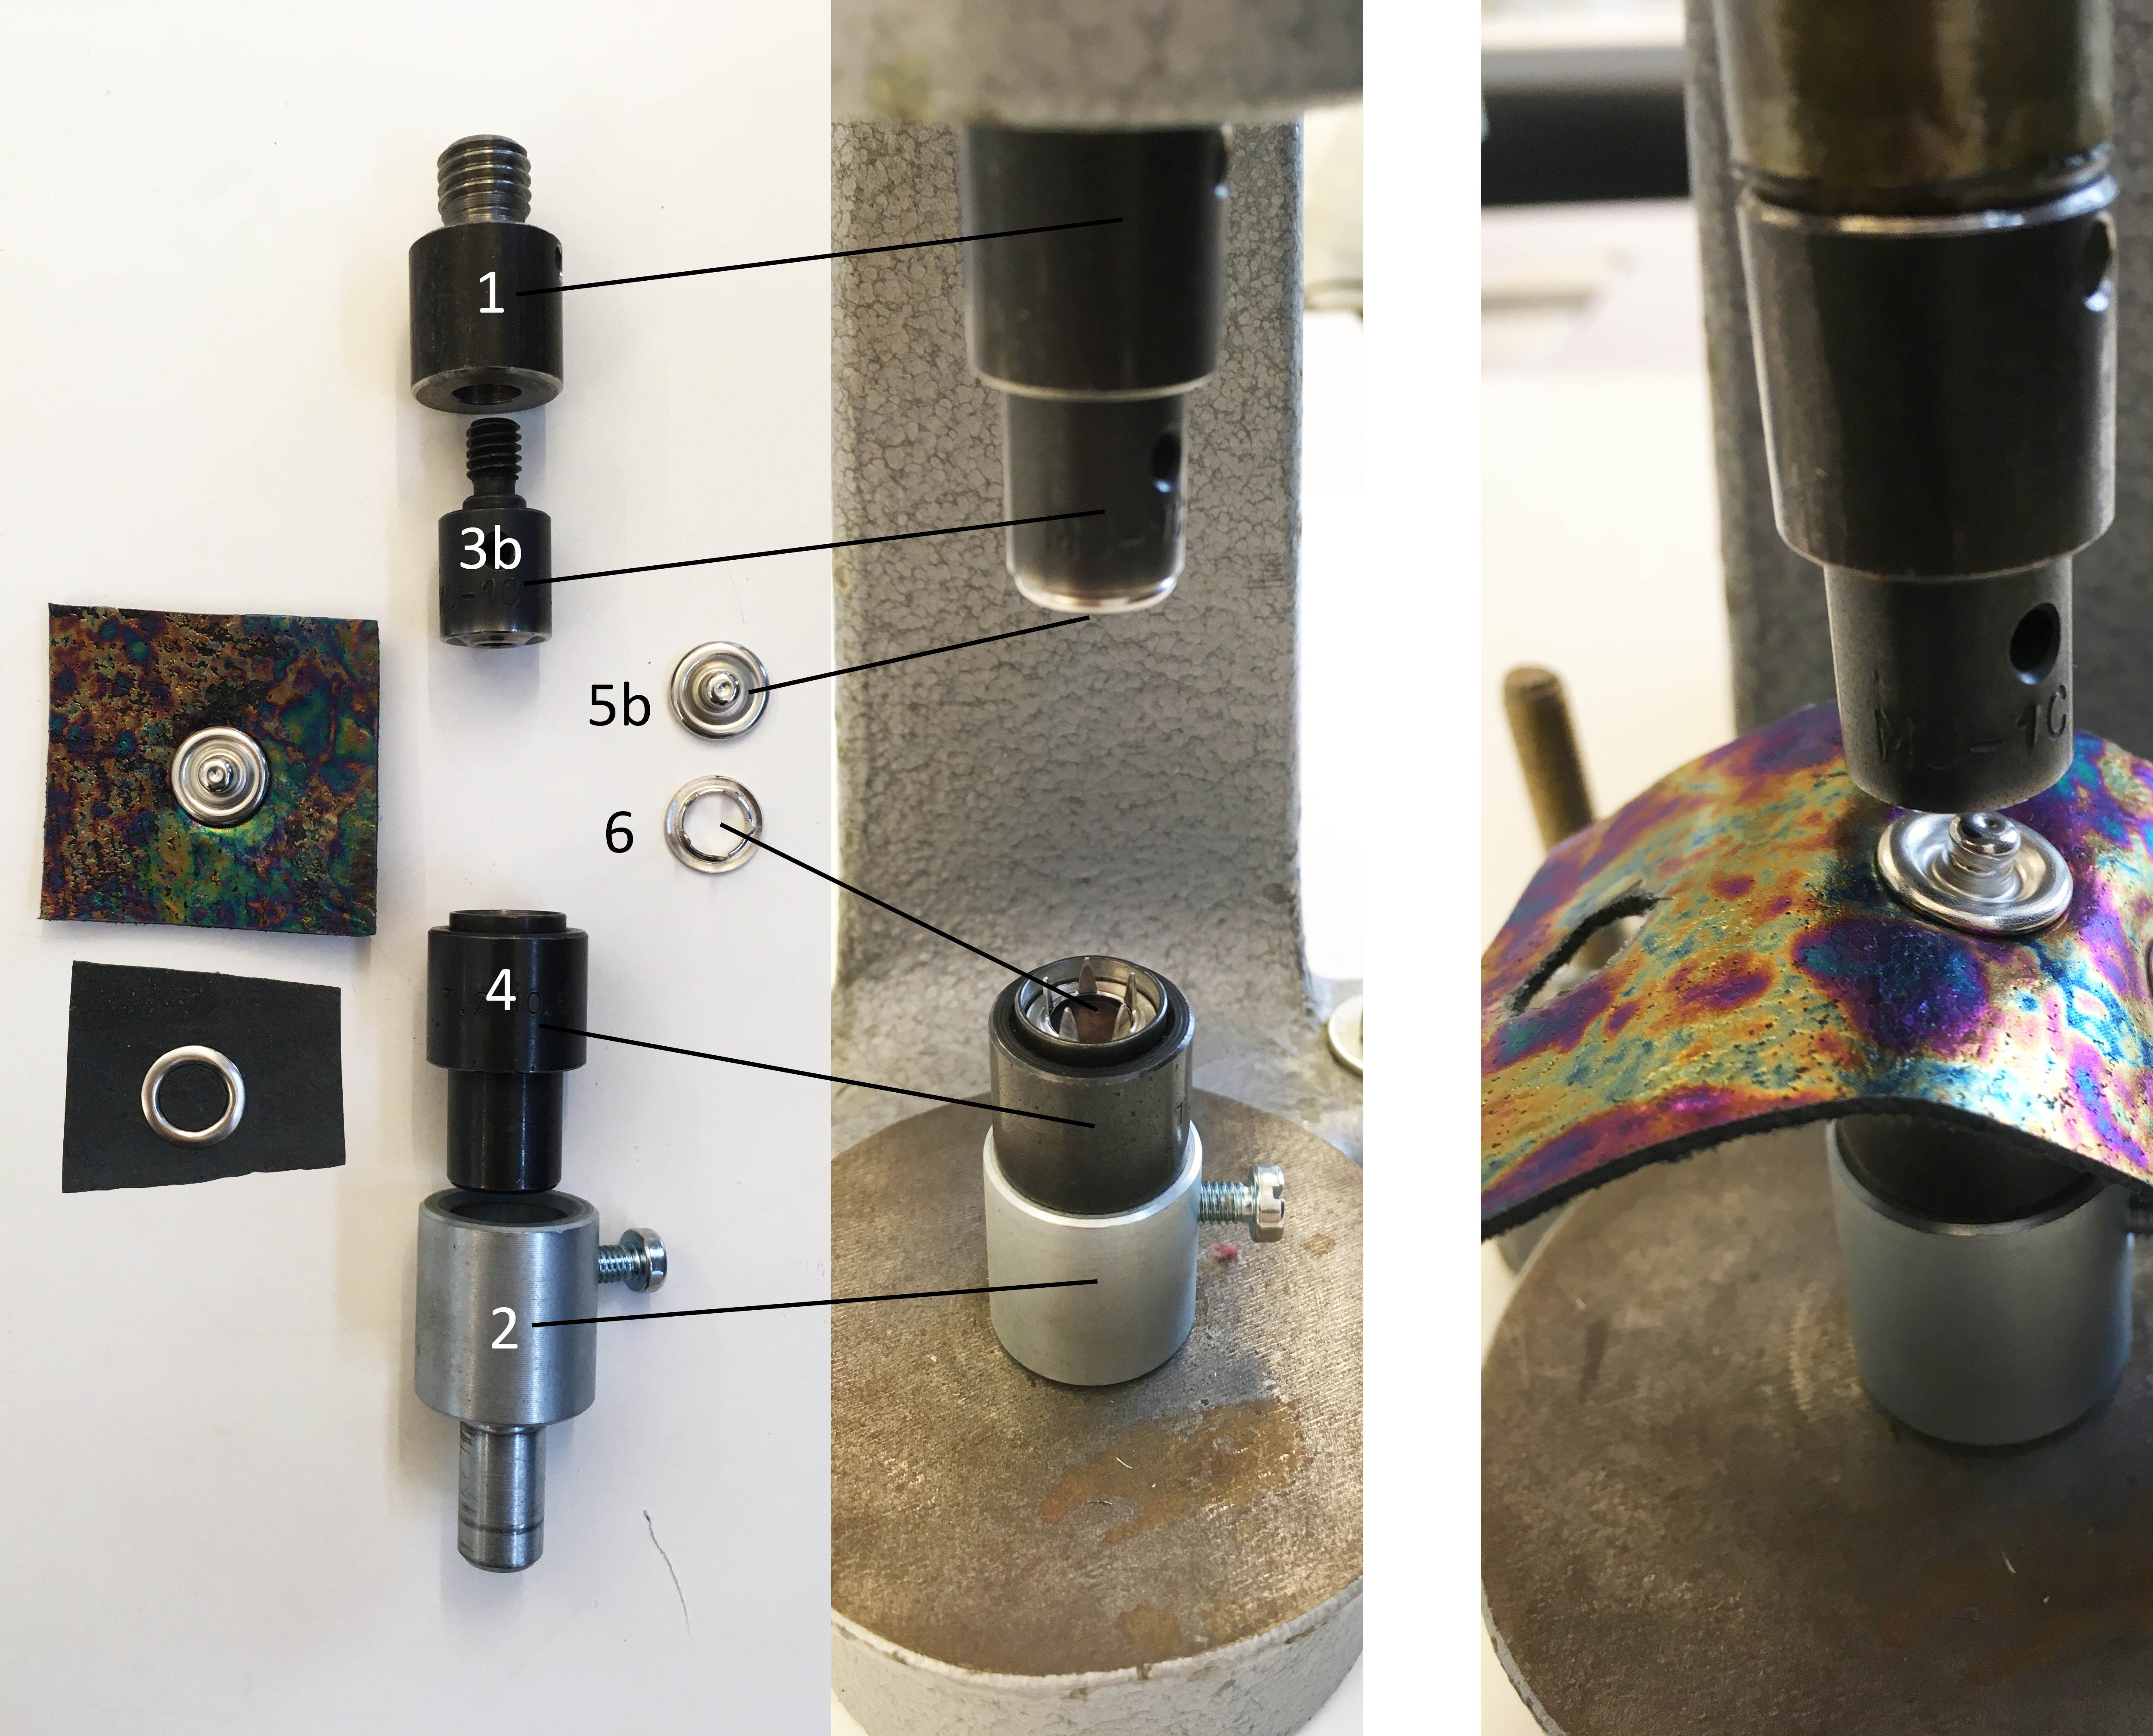
- Change the top part of the tool 3a ->3b and attach the other side of the press-stud, using the male part (5b).
Insert the Elegant 3b parts as illustrated, do not overtighten.
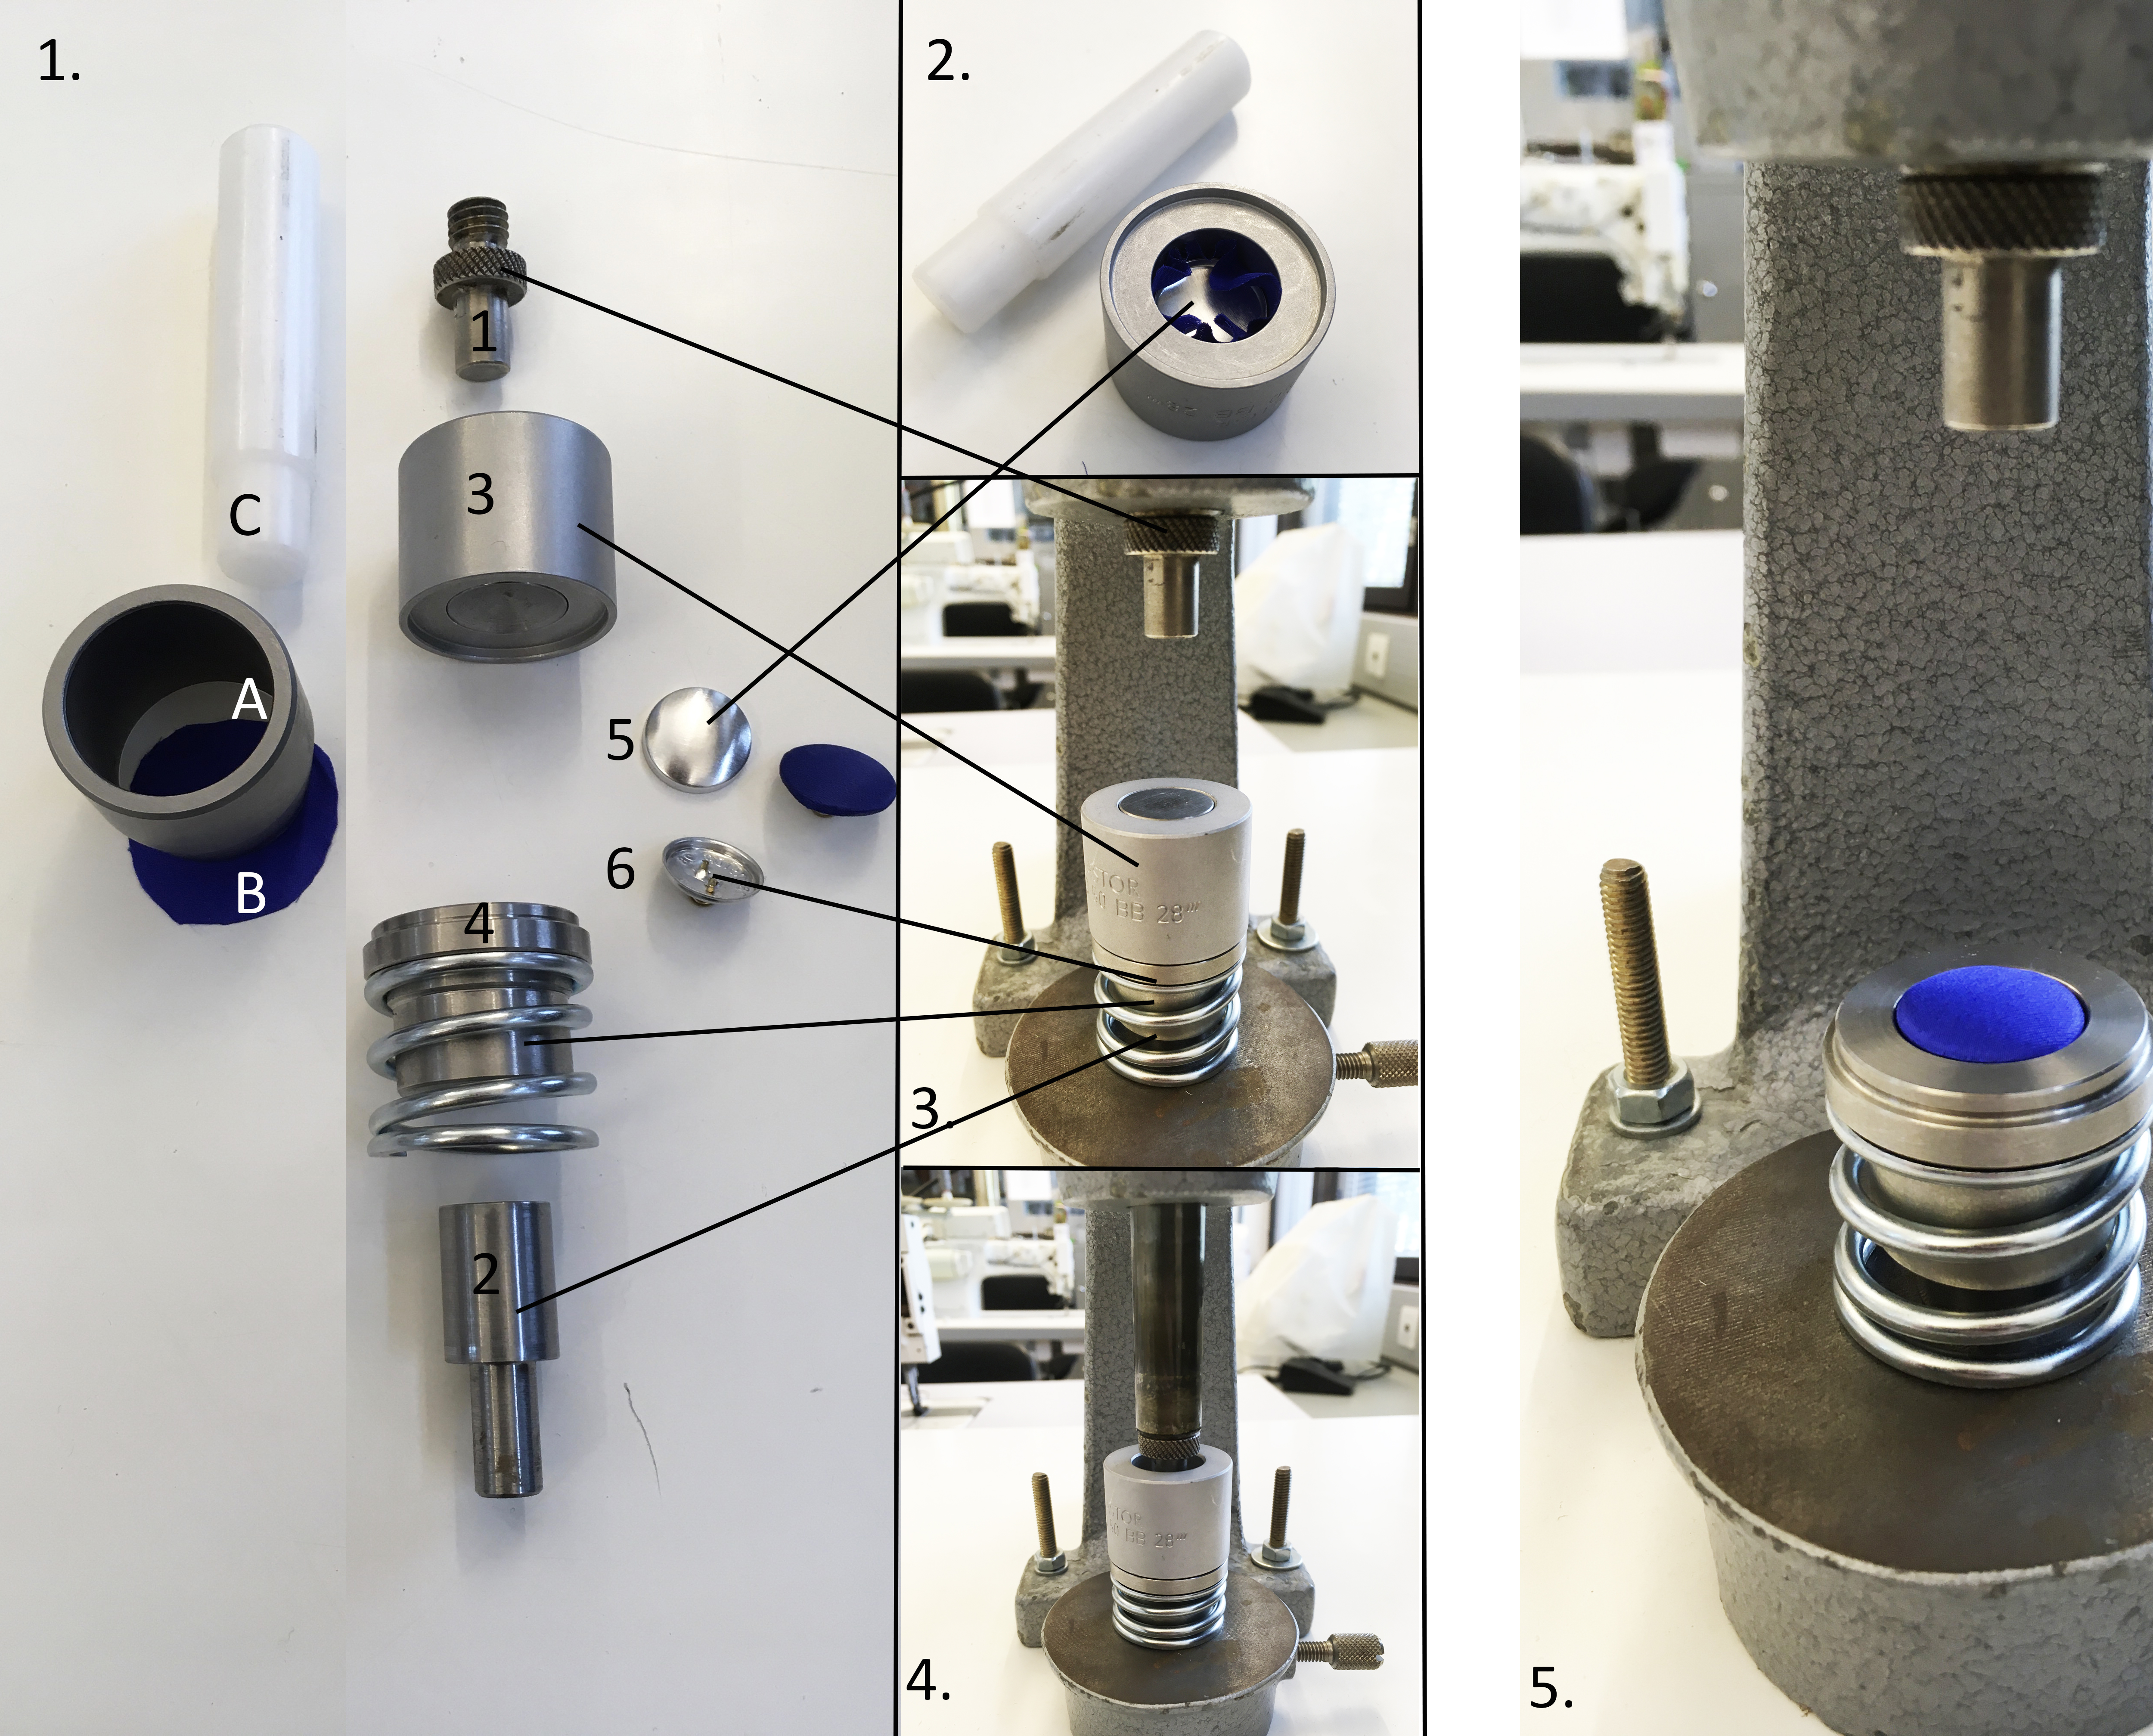
Covered buttons (18mm, 28mm and 36mm)
- Insert the tool parts as illustrated. You will need:
- a separate adapter for the top (1)
- top tool part in the correct size (3)
- bottom tool parts in the correct size (2, 4)
- button blanks for the front (5) and back (6) in the correct size.
- Mark the size of the button in the fabric using the appropriately sized cutter A, cut out the shape B.
- Insert the fabric (B) and the blank front of the button (5) into tool part 3. Press to the bottom using the instrument C.
- Place the blank back of the button (6) inside the lower parts of the tool (2, 4).
- Press tool part 3 on top of the lower tools (2, 4).
- Press and remove tool part 3.
Last modified: Tuesday, 16 January 2024, 1:37 PM