OK7 Costume Workshop
Sewing Studio manual
Krav för slutförande
Learn how to operate and adjust the industrial sewing machines, and learn how to use the steam iron unit. The instruction videos (5) will show you in detail how to operate and adjust the machines. Note: Open the table of contents from the black arrow "Open block drawer" in the upper right corner.
GENERAL INSTRUCTIONS
- Select the machine according to its intended use (see machine descriptions).
- Turn off the machine when changing the bobbin / needle, and when checking the threading.
- Eye and finger protection components cannot be removed.
- The machines are extremely rarely broken. Usually, the problems are caused by issues with threading or the condition of the needle. Be patient and try to solve the problem.
2. Overlockers (video)
2.1. Threading (video)
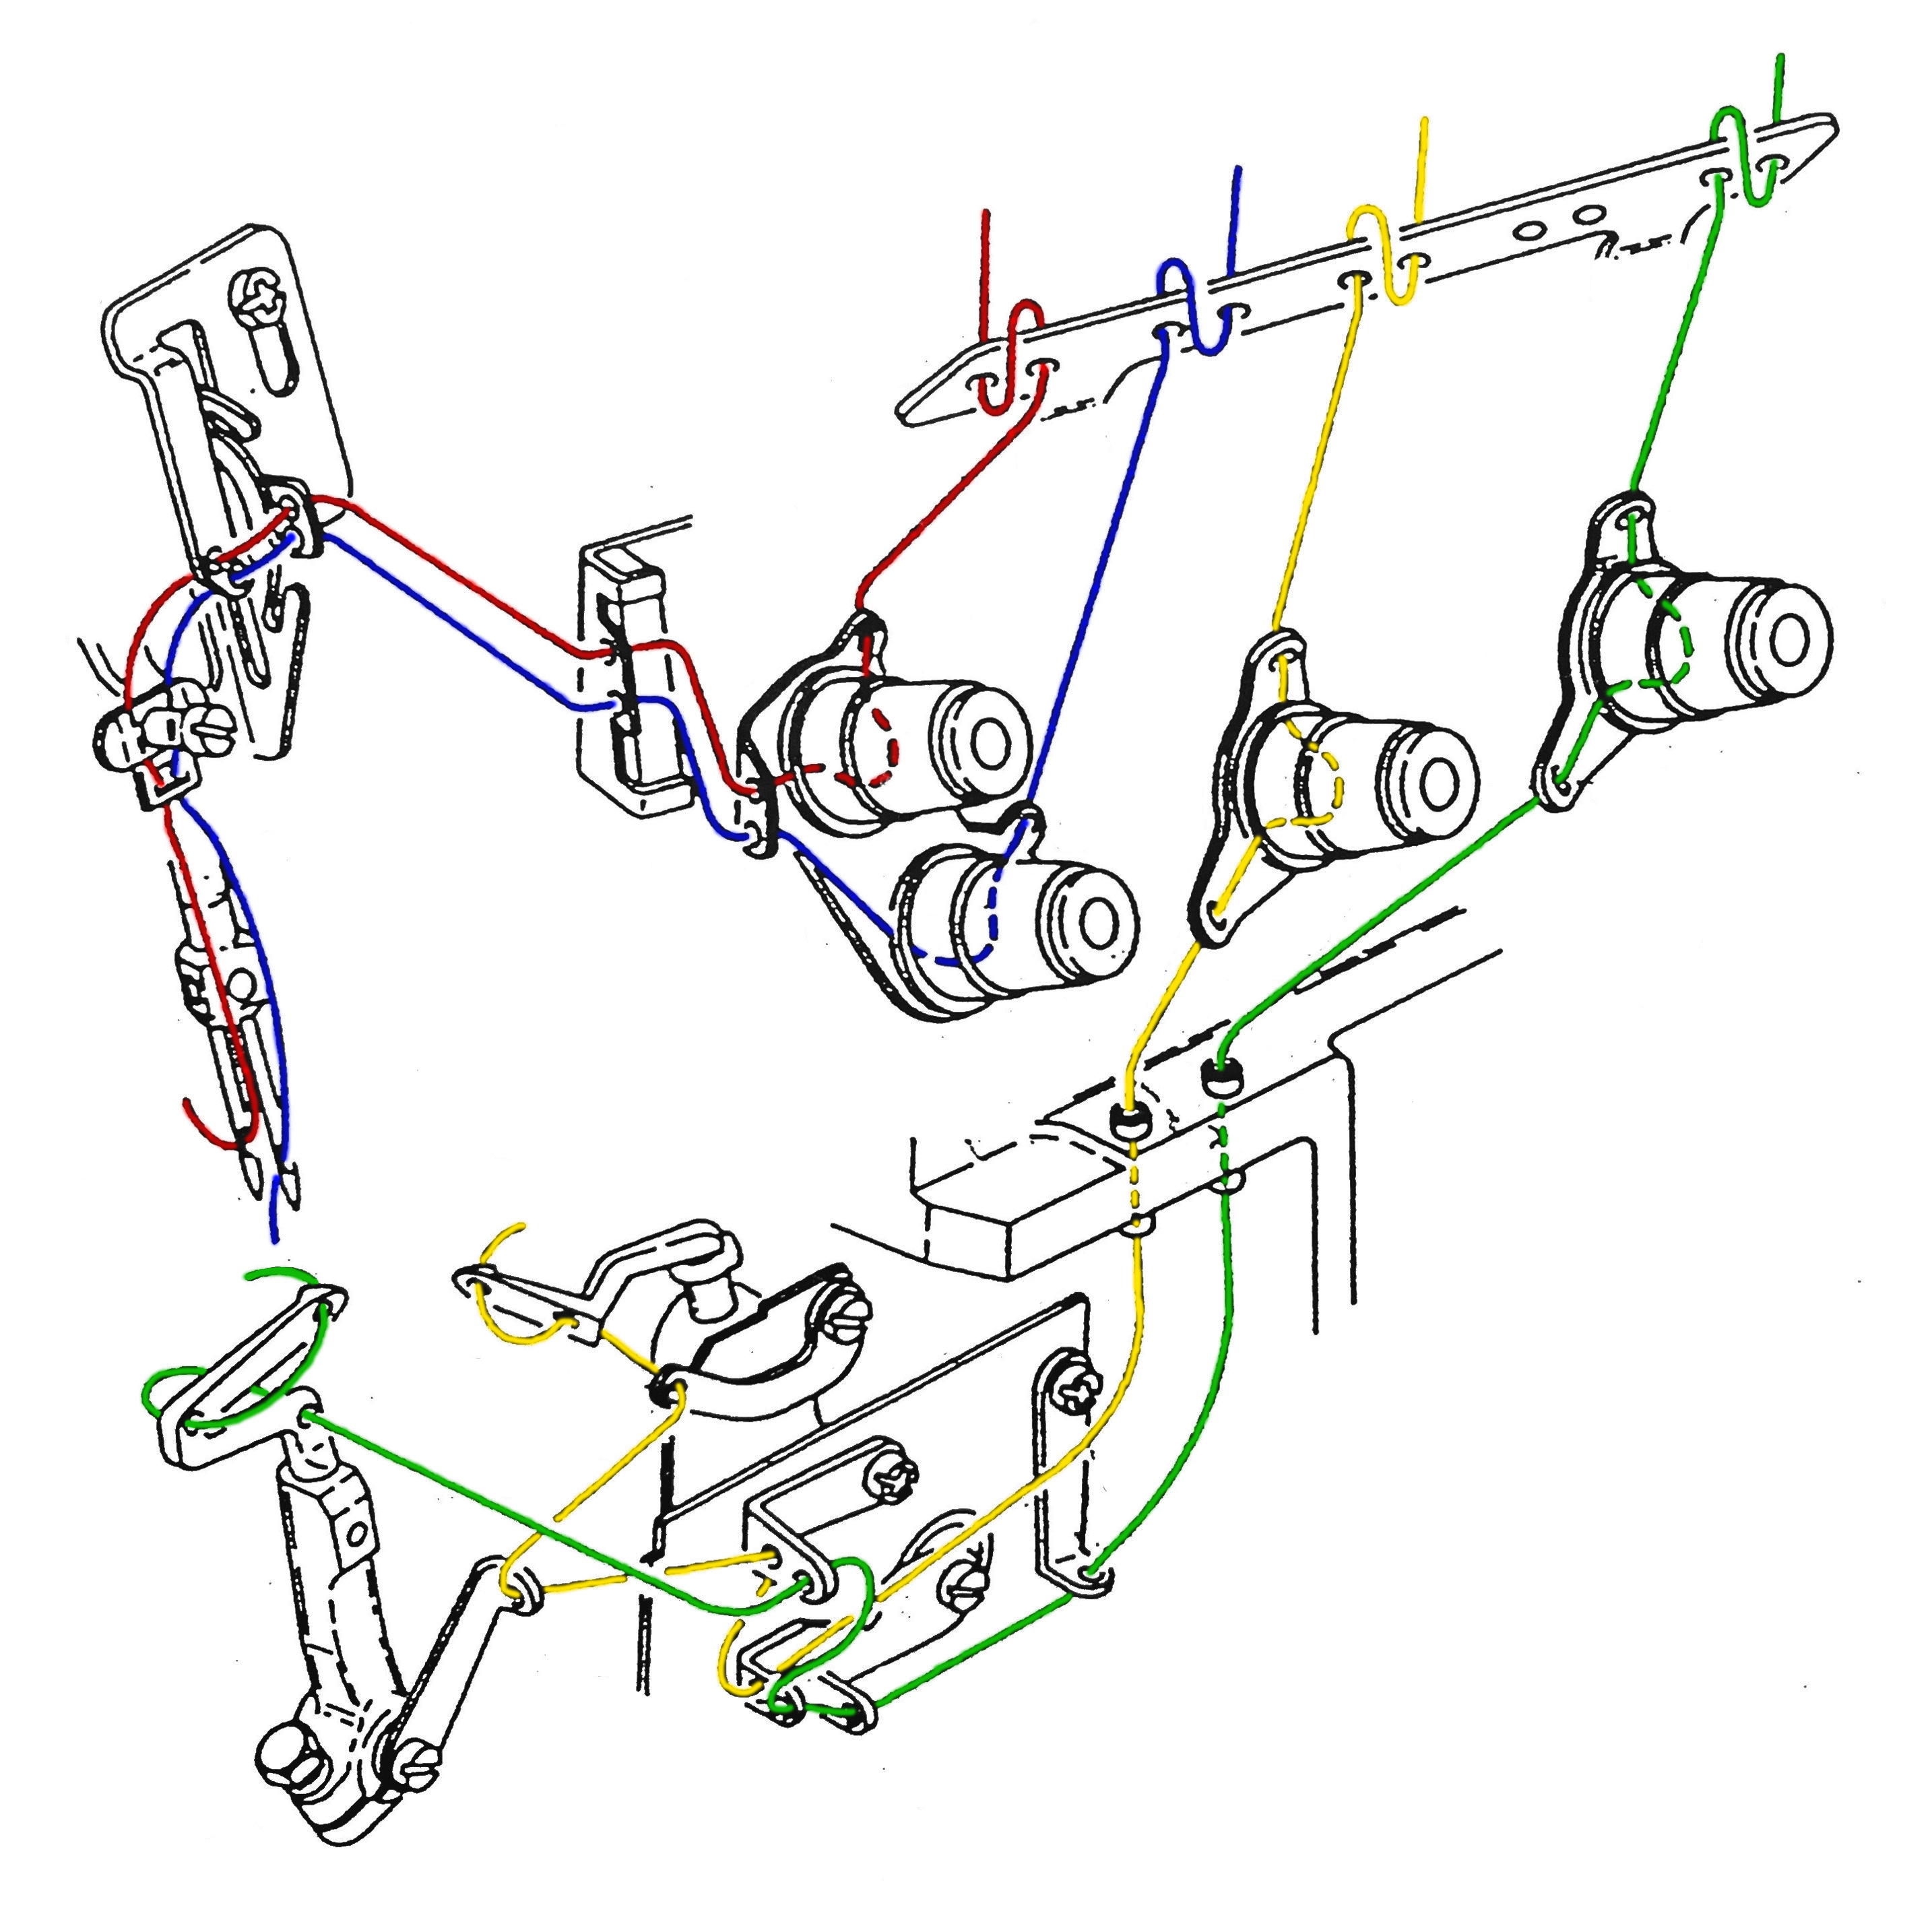
The threading of an overlocker requires attention to detail. Each machine has its own threading chart, which must be strictly observed. No stitch will be generated if there is even a minor error in the threading.
Changing threads with the help of current threading
- Turn off the machine.
- Cut the current threads as close as you can to the thread cones, remove the cones and put new ones in place.
- Take the ends of the two threads and a make a double knot, making sure that the knot holds.
- Cut the needle threads below the needle, the looper threads are released.
- Gently pull the new threads through one at a time. If the thread appears to be caught, gently move it back and forth, and you can also open the machine and help with tweezers.
- Insert the thread into the eye of the needle last.
- Test your stitch on a piece of fabric.
Opening the machine and checking the threading
- Open the machine:
- Lift the tabletop aside.
- Open the front cover of the machine (the threading chart can be found here).
- Turn the left side of the machine aside.
- Release the presser foot using the lever behind it and turn aside.